

11
Dec
How to Install Smart Window Film: A Step-by-Step Guide
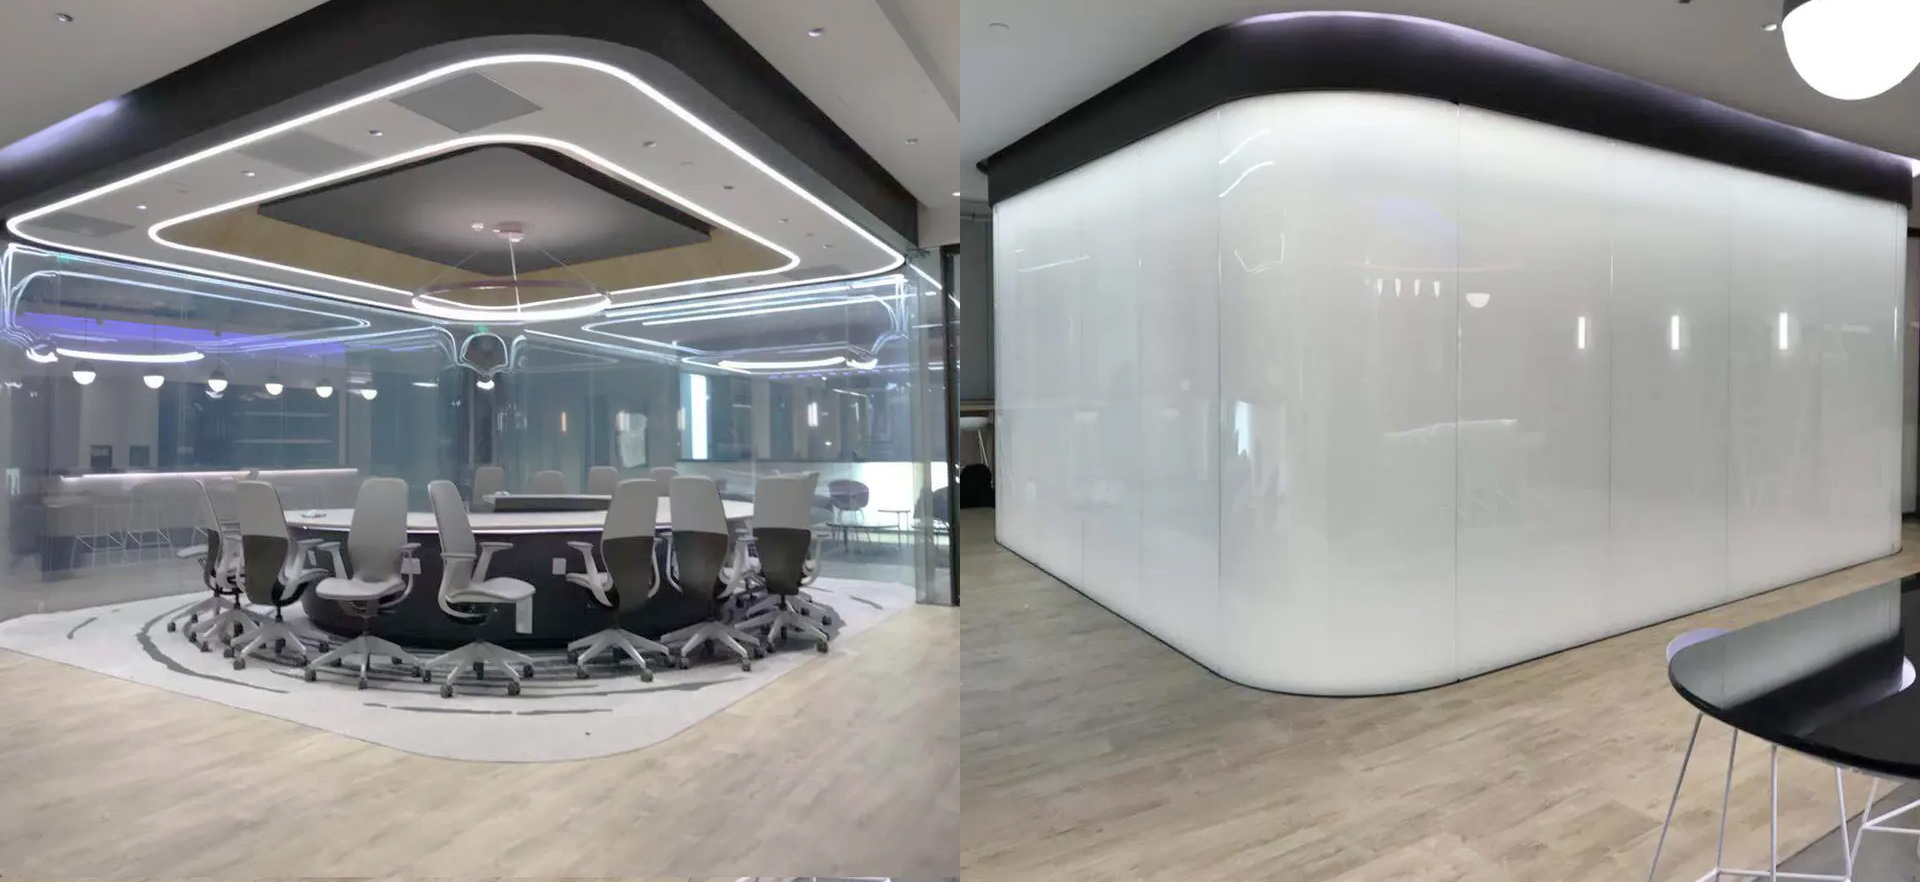
Smart window film (also known as PDLC or switchable film) is an innovative material that transforms ordinary glass into on-demand privacy glass. When powered on, the film turns clear; when off, it instantly frosts. This gives architects and homeowners dynamic privacy control, light management, and a modern aesthetic. PDLC Smart Film “offers a comprehensive solution for privacy, light control, aesthetics, energy efficiency, and security,” making it valuable for homes, offices, and commercial spaces. Its sleek, minimalist design can be customized (with logos or patterns) to enhance any interior, adding instant sophistication to partitions, doors or windows. The film also reduces glare and heat gain (improving comfort and lowering cooling costs) and can block up to 99% of harmful UV rays. In short, switchable smart film modernizes your space by providing privacy on demand, better light control, and energy savings.
For high-quality PDLC smart film and supplies, shop all your project needs. For custom assistance or pricing, get a quotation today.
Key Considerations Before Installation
Before starting, consider the following:- Glass Surface and Environment: The glass must be smooth, dust-free, and undamaged. Clean both sides if possible to spot debris. PDLC film adheres to most flat, non-porous glass (clear or tinted), but tempered or double-pane glass may require special handling or laminated film. Avoid any glass with pits or scratches. Also work in a clean, indoor environment (avoid windy or dusty conditions) and at moderate temperature/humidity.
- Film Type – Adhesive vs. Laminated: There are self-adhesive PDLC films and laminated PDLC films. Self-adhesive film has a peel-and-stick backing and is ideal for retrofitting existing windows (easy DIY). Laminated film is sandwiched between glass panes during manufacturing, offering extra durability for new construction. This guide assumes self-adhesive film for DIY installation, as it “eliminates the need for special equipment” and simply peels-and-sticks to the glass.
- Tools and Materials: Gather everything before you begin. Essential tools include nitrile (non-powdered) gloves, a non-ammonia glass cleaner, 99% isopropyl alcohol, a squeegee or applicator card, a soft rubber roller, lint-free (microfiber) cloths, low-adhesive painter’s tape, and a sharp, stainless steel scissors or razor blade (for trimming film). You’ll also need silicone sealant (non-acidic), plastic wire mold or trim, a soldering iron or wire nuts, electrical leads/wires, and a low-voltage power transformer or switch. An electrical tester (continuity checker) is useful to confirm wiring. A list of typical tools is provided by manufacturers. (Note: Wear gloves when handling the film to avoid fingerprints or scratching.)
- Film Orientation: Identify the powered side. Self-adhesive film has a protective liner on the adhesive side and copper mesh busbars along one edge for the electrical connection. Plan which edge will have the power feed. The copper tabs (busbars) must not touch any metal frame to avoid shorting. Usually the busbar side goes at the top or bottom of the window. When cutting, leave the mesh tabs intact until you wire the film (see below).
Step-by-Step Installation
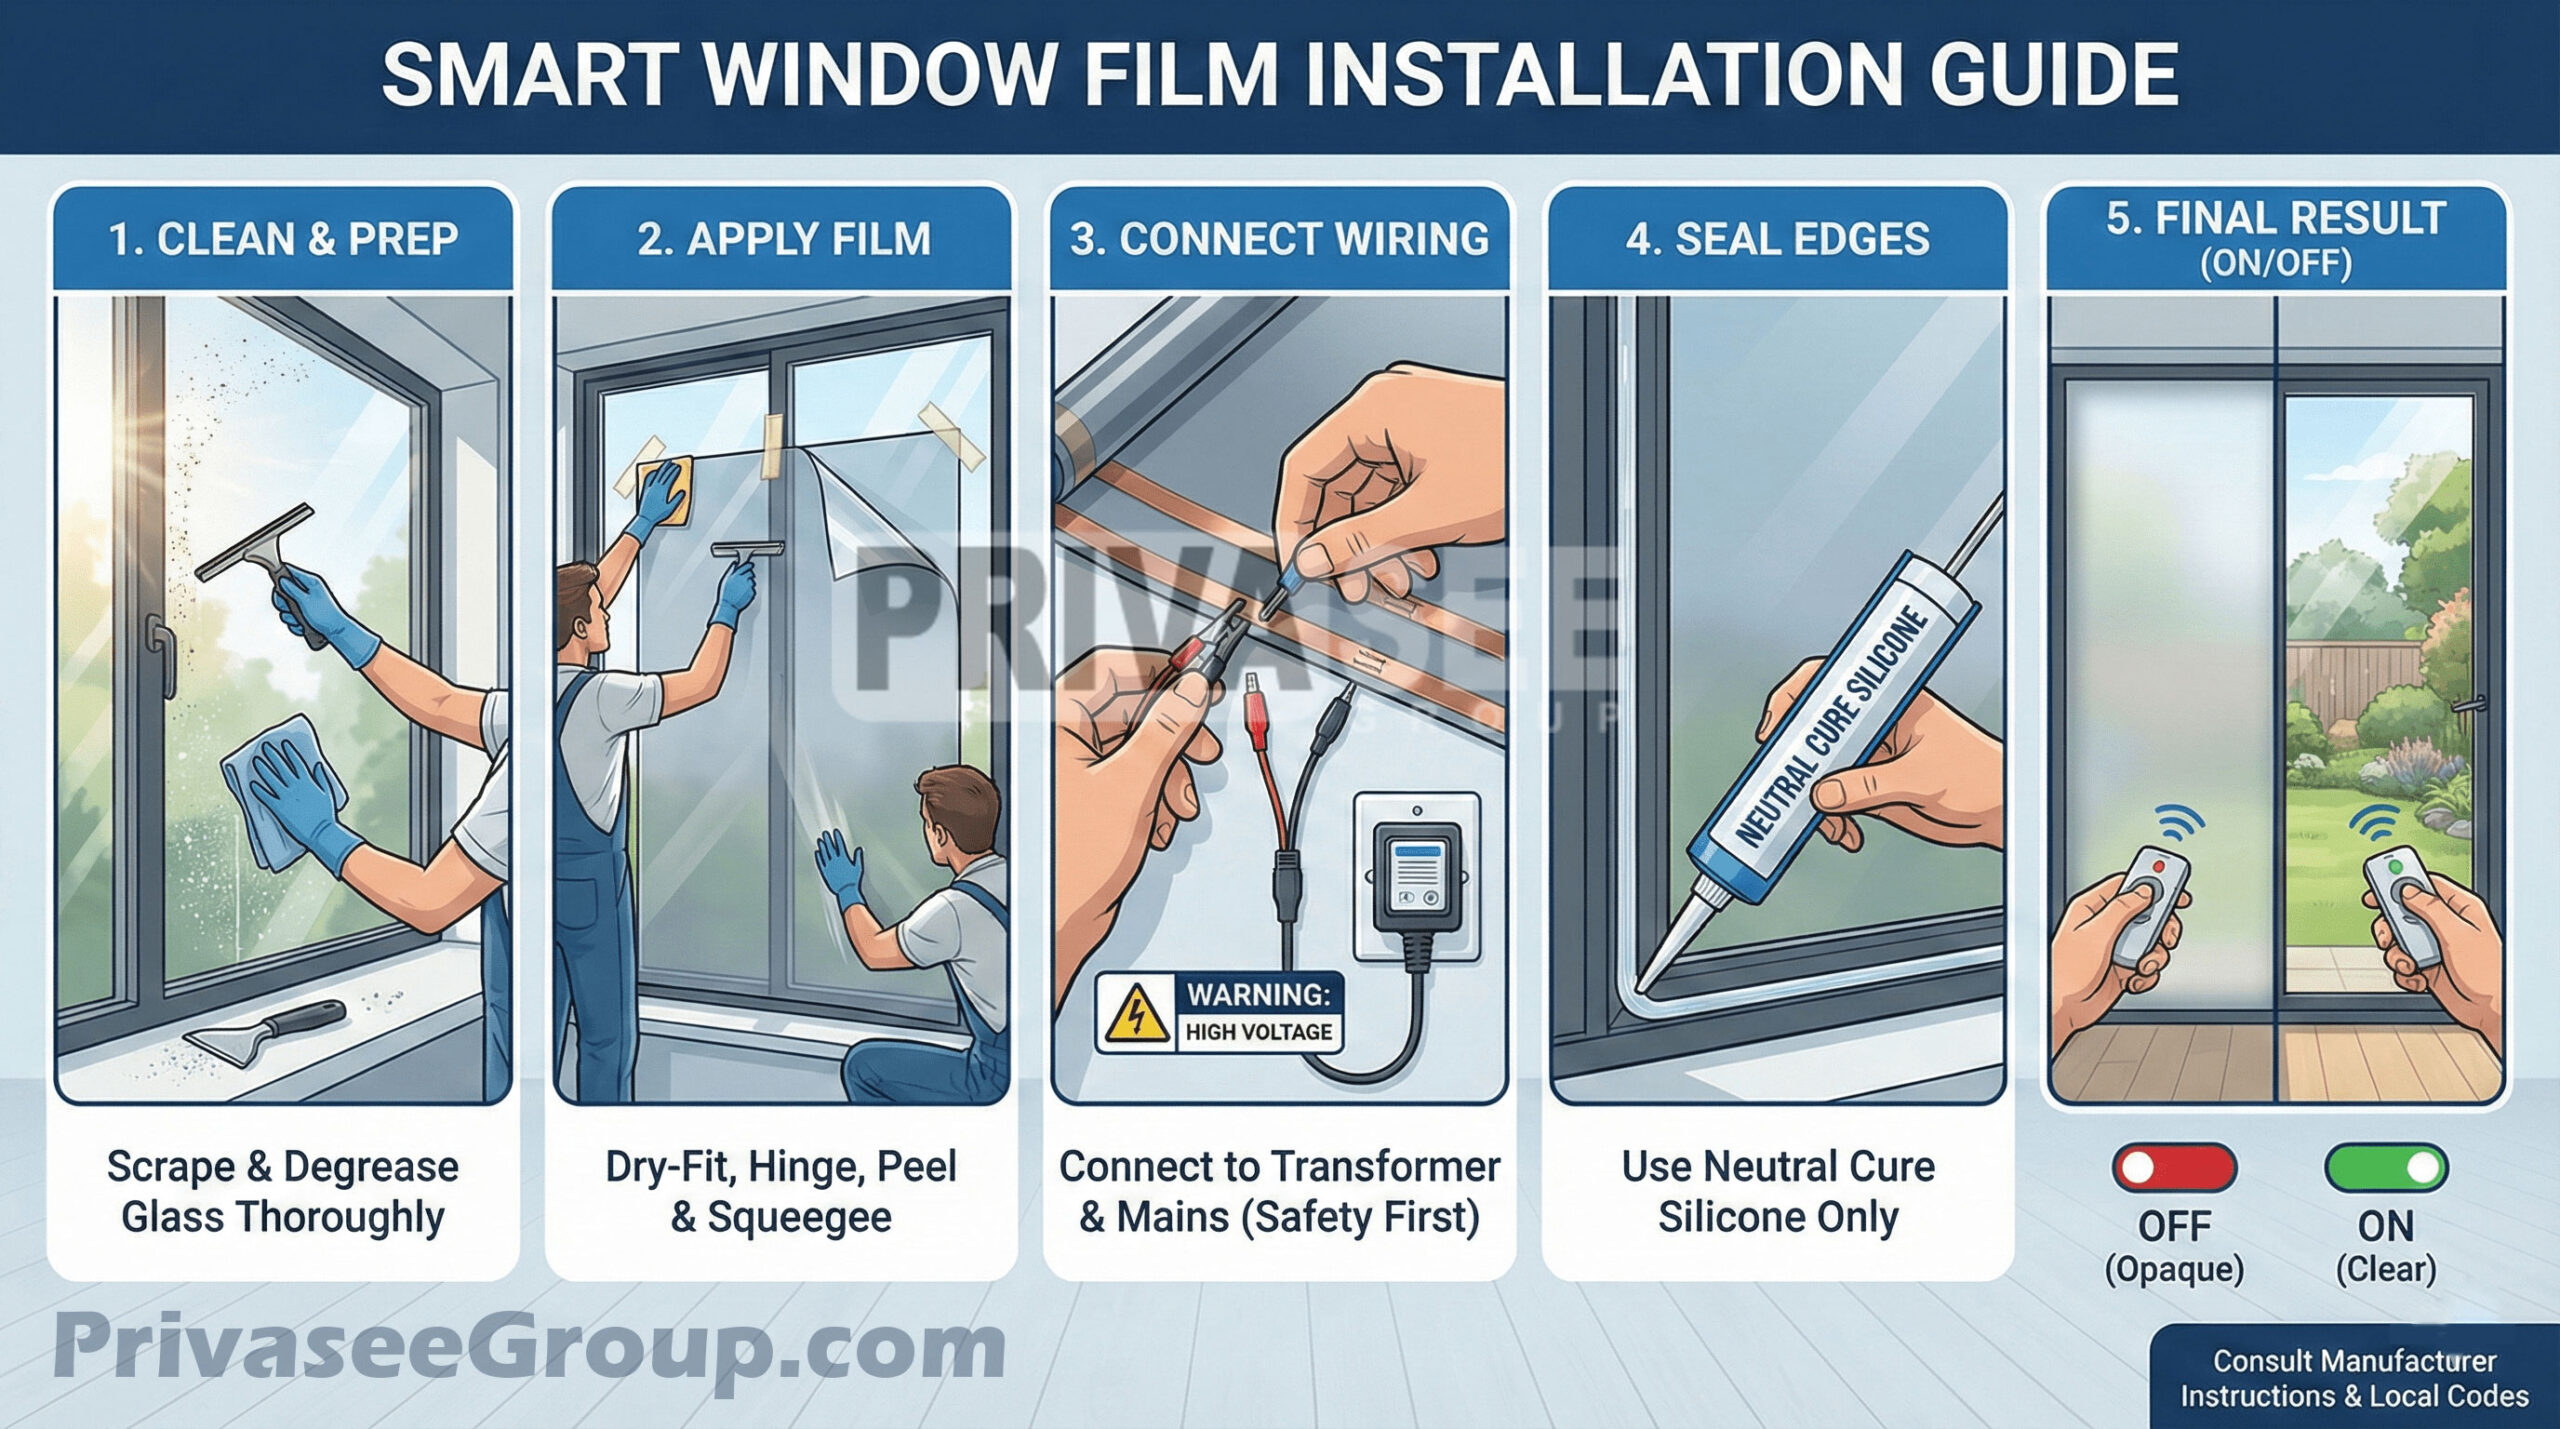
Follow these five steps carefully for a smooth installation. Work slowly and methodically to avoid bubbles or misalignment.- Clean and Prep the Glass. Begin by thoroughly cleaning the glass. Remove any stickers, tape, dust or debris. Use a non-ammonia glass cleaner and a squeegee to scrub the surface. For stubborn residues or oils, spray 99% isopropyl alcohol and gently scrape with a razor blade. Wipe the glass with a lint-free cloth and let it dry completely. Insight: Proper cleaning is critical – up to 80% of installation issues come from inadequately cleaned or prepped glass. Working in a clean, dust-free area will minimize dirt that causes bubbles.
- Measure and Cut the Film. Carefully measure the glass dimensions and add a small margin (1–2 mm on each side) for final adjustment. Unroll the smart film on a clean, flat surface (wear gloves). If the film is longer than needed, cut it with the stainless scissors to size. Do not use razor blades directly on the film edge (to avoid delamination). If the film comes oversized, it can be trimmed after initial application. Tip: Mark the glass edges with tape for alignment. Check that the film’s copper mesh edge will align with your planned wiring side.
- Position and Apply the Film. Peel back 2–3 inches (5–7 cm) of the protective liner from the adhesive side, just at the edge where the copper contacts are (as per the manufacturer’s instruction). Align the film’s top edge (with the busbars) to the top of the glass. Press the exposed adhesive portion onto the glass and smooth it with your finger or a roller. This initial contact holds the film in place. Then, slowly peel away more of the liner while gently using the rubber roller or squeegee to press the film onto the glass. Work from top to bottom (or one side to the other) evenly. If a section lifts or a bubble forms, gently lift the film at that spot and let it fall back under gravity, then press it down. Continue until the entire film adheres. Note: Avoid stretching the film or dragging it; let it lay smoothly.
- Remove Air Bubbles and Seal Edges. Once the film is fully applied, use a small squeegee or microfiber cloth to push any remaining air bubbles toward the edges. Bubbles should roll out; do not puncture the film. After smoothing, you may notice a slight gap (0.5–1 mm) between the film edge and the window frame – this is normal and prevents shorting. Seal the edges for durability: apply a thin bead of non-acidic silicone sealant along the busbar edge and corners. Then cover the busbar and wires with a plastic trim or wire mold (non-conductive) to hide wiring and prevent contact. Warning: Do not use acid-based silicone (it can damage the electronics), and ensure metal trim or screws do not touch the copper mesh.
- Connect Wiring and Test. With the film adhered, remove the final outer protective liner. Solder (or securely crimp) the low-voltage wires to the copper mesh tabs: one wire to the left tab (positive) and one to the right tab (negative). Use an electrical tester to double-check polarity and that connections are solid. Before finishing, test the film’s operation: power up the transformer or switch. The film should change from opaque to clear instantly. If it does not, check for loose contacts or shorted wires. Once confirmed working, trim off any excess mesh tab and tuck the cables neatly into the trim.
Best Practices and Common Mistakes
- Glove Up and Handle Carefully: Always wear clean, lint-free gloves. Fingerprints or oils can show through the film or cause adhesion issues. Handle the film edges gently to avoid delamination or tearing.
- Measure Twice, Cut Once: Precise measurements prevent having to reapply the film. If possible, have the film pre-cut by the supplier to fit your glass to avoid on-site sizing errors.
- Test Before Full Application: Always test the film with a switch cord (if provided) before sticking it on the glass. It’s much easier to replace a defective film at this stage than after installation.
- Work Slowly and Evenly: Avoid rushing. Smooth the film gradually, pressing out air in sections. Using tape “handles” on corners (taping each corner to lift it) can help control placement.
- Don’t Skip Cleaning: As noted, improper cleaning causes most problems. Even a small speck of dust can create a permanent bubble. Use tacky masking tape or microfiber cloth to pick up any remaining particles before application.
- Use the Right Cutting Tools: Use sharp stainless scissors or a new blade for cutting. Do not scrape or cut with rough tools – the PDLC layers are delicate. After trimming, roll the cut edge firmly to ensure adhesion and avoid any high-resistance spots.
- Avoid Electrical Shorting: Maintain a tiny gap between film edges and any conductive frame. Cover exposed busbars immediately with insulating trim. Never leave wires loose.
- Seal Edges: Especially for exterior or wet areas, seal around the film perimeter with silicone to protect it from moisture. But only use a neutral-cure (non-acid) silicone sealant to avoid damaging the film.
For high-quality PDLC smart film and supplies, shop all your project needs. For custom assistance or pricing, get a quotation today.
Share this post

RELATED
Posts
Switchable Smart Film vs Smart Glass: Which One Should You Choose?
Modern buildings demand smart privacy solutions that combine functionality, efficiency, and style. As a result, switchable smart film and smart glass have...
read more
The Tech Guide: Integrating Smart Glass with Home Automation
Integrating PDLC (Polymer-Dispersed Liquid Crystal) smart glass into a home automation system is the ultimate upgrade for any high-end residential or commercial...
read more
Interior Design Inspiration: Using Smart Glass and Motorized Curtains in Luxury Homes
The definition of luxury living has evolved beyond opulent finishes to embrace intelligent design, seamless technology, and dynamic spaces that adapt to...
read more